Carpenters Hall and the 1st Continental Congress

This weekend, I was combing through some old photos, looking for a specific piece of furniture.  While I didn't find the photo I was looking for, I did run across a couple of interested photos from my trip to Philadelphia back in 2011.

Just two blocks away from the State House (now known as Independence Hall) sits the Carpenters Hall.  Rather than risk Tory intervention by meeting at the State House, the members of the First Continental Congress chose to meet at the newly-completed Carpenters Hall.

Carpenters Hall as it appeared in 2011.
The building itself is a fascinating look at the architecture and building techniques of the 18th century (the building had just been finished in 1774 when it was chosen to be the first meeting house for the Continental Congress).

There are a number of old tools (mostly 19th century but still interesting), some dioramas of colonial building techniques, and a number of banners and flags used by the Carpenters Company of Philadelphia in parades.  But, by far, the best part of the building (at least for an 18th century furniture geek) are the chairs...

Chairs, you might be asking? Zach, you're not a chair maker and you've never shown an interest in chairs... why would you care? Well, dear readers, these are eight of the ACTUAL chairs in which the members of the First Continental Congress parked their rears while beginning to lay the framework of the crazy idea that would ultimately become the nation we know and love today.

I present the pics I (and my wife April) took of those chairs here to you now. Unfortunately, I was unable to get close enough to provide scale, but the chair builders among you should be able to figure it out.


I hope that someone finds this information helpful.

Gooseneck Facade Part 2

I had a fair bit of time in the shop last night, so I was able to get a lot of the facade done last night. This is a good thing, as my goal is to have this thing finished off by the end of the year and I know that carving the gooseneck moldings will take me some time.

Anyhow, I started with the remainder of the cherry board from which I cut my two case sides.  This is important as it will hopefully make the finishing process easier and more consistent. The sash door and moldings will also be made from this same board.

This board was stored under cover outside but still
got a little water. No damage though. Just a couple of stains.
I have two cherry boards that were cut from this same tree. The tree grew on the property of Tillers International and they were given to me by a good friend and former instructor there, Steve Stier.

I started rough flattening one side of the board, the side on which I will draw the pattern.  I will rough plane the opposite side as well, but will only really care about thickness and flatness where the facade board attaches to the case. Other than that, it will be whatever it will be. No need to get crazy about it.

Like my latest work holding device? Its an offcut from making
the seat for my '26 Model T. Works great!

Once I had that side flat enough, I straightened and squared the bottom edge. This is the most important part of the whole facade, as this part will determine not only the overall square "look" of the piece, but also how the sash door will fit and operate. It has to be straight and square.

With that done, I then simply lined up the bottom edge of my template with the square edge and traced around the template with a pencil. I then flipped the pattern over its middle line, lined up the edges again and traced the opposite side.

Flat enough in the areas that matter.
Any tearout will be removed via scraper at a later time.
With the line completed, I then cut the pencil line in with my favorite carving knife, which is sharp enough to sever the grain without applying any real force to it at all. This makes it easy to stay on line while providing me with a sharp reference line. 

Then, I simply cut in the square ends to the piece, staying just off the line so that I have material to trim plush with the case. Lacking a decent turning saw (the coping saw in the pictures was an experiment... no go), I then proceeded to use my rip saw to cut a straight line that is very close to the curve.  I just bought a table saw (a real table saw, not one with a motor) but I haven't sharpened it yet, so a straight line that is close is the best I could do, even on these gentle curves.  

A turning saw would have helped me to save a little material but this works very well
A couple of strategic cuts with my panel saw to sever the large waste and a couple of backsaw cuts to clean out the middle and I had a roughly shaped blank.

This thing has more curves than Jayne Mansfield...
One that was complete, I then took a chisel (a very nice EA Berg that was a Galootaclaus gift), and started to pare down close to the line. I will finish this work with a rasp, but large parts of the waste can be simply removed by making stopping cuts with a backsaw, then removing the waste with a chisel. 

If you try this technique, make sure not to chop along the grain with the chisel. You will blow out big chunks of the back side of the work. By along the grain, I mean the areas where the pattern line runs with or close to with the grain, such as the top curves and the bottoms of the side curves near the straight-sawn ends. Only pare in these areas and only with the lightest touch. Cross-grain work is actually easier and less damaging with this method. 

The strop is a 4" chunk of old machine tool belting. How cool is that?
Once I was close to the line, I called it a night. This weekend I aim to finish down to my line with a cabinetmakers rasp and then use a sash fillister to cut a perfectly square back face so that I can attach the piece to the case.  I probably won't attach the facade until I have the gooseneck moldings glued and nailed to it so that I can trim and rasp the pieces flush without fear of damaging the case.

Take 2 - Gooseneck Facade part 1

Apparently, something in my previous version of this post was corrupted. I got several messages informing me of errors. So here it is again...

I only had about an hour in the shop last night, so I wasn't able to make much progress on my cabinet. When I know I have a short time, I try to focus on getting one small step done.  This helps eliminate some of the frustration of having to wrap up shop work quickly. The part I chose to focus on yesterday was the facade template.

The original on which my work is based

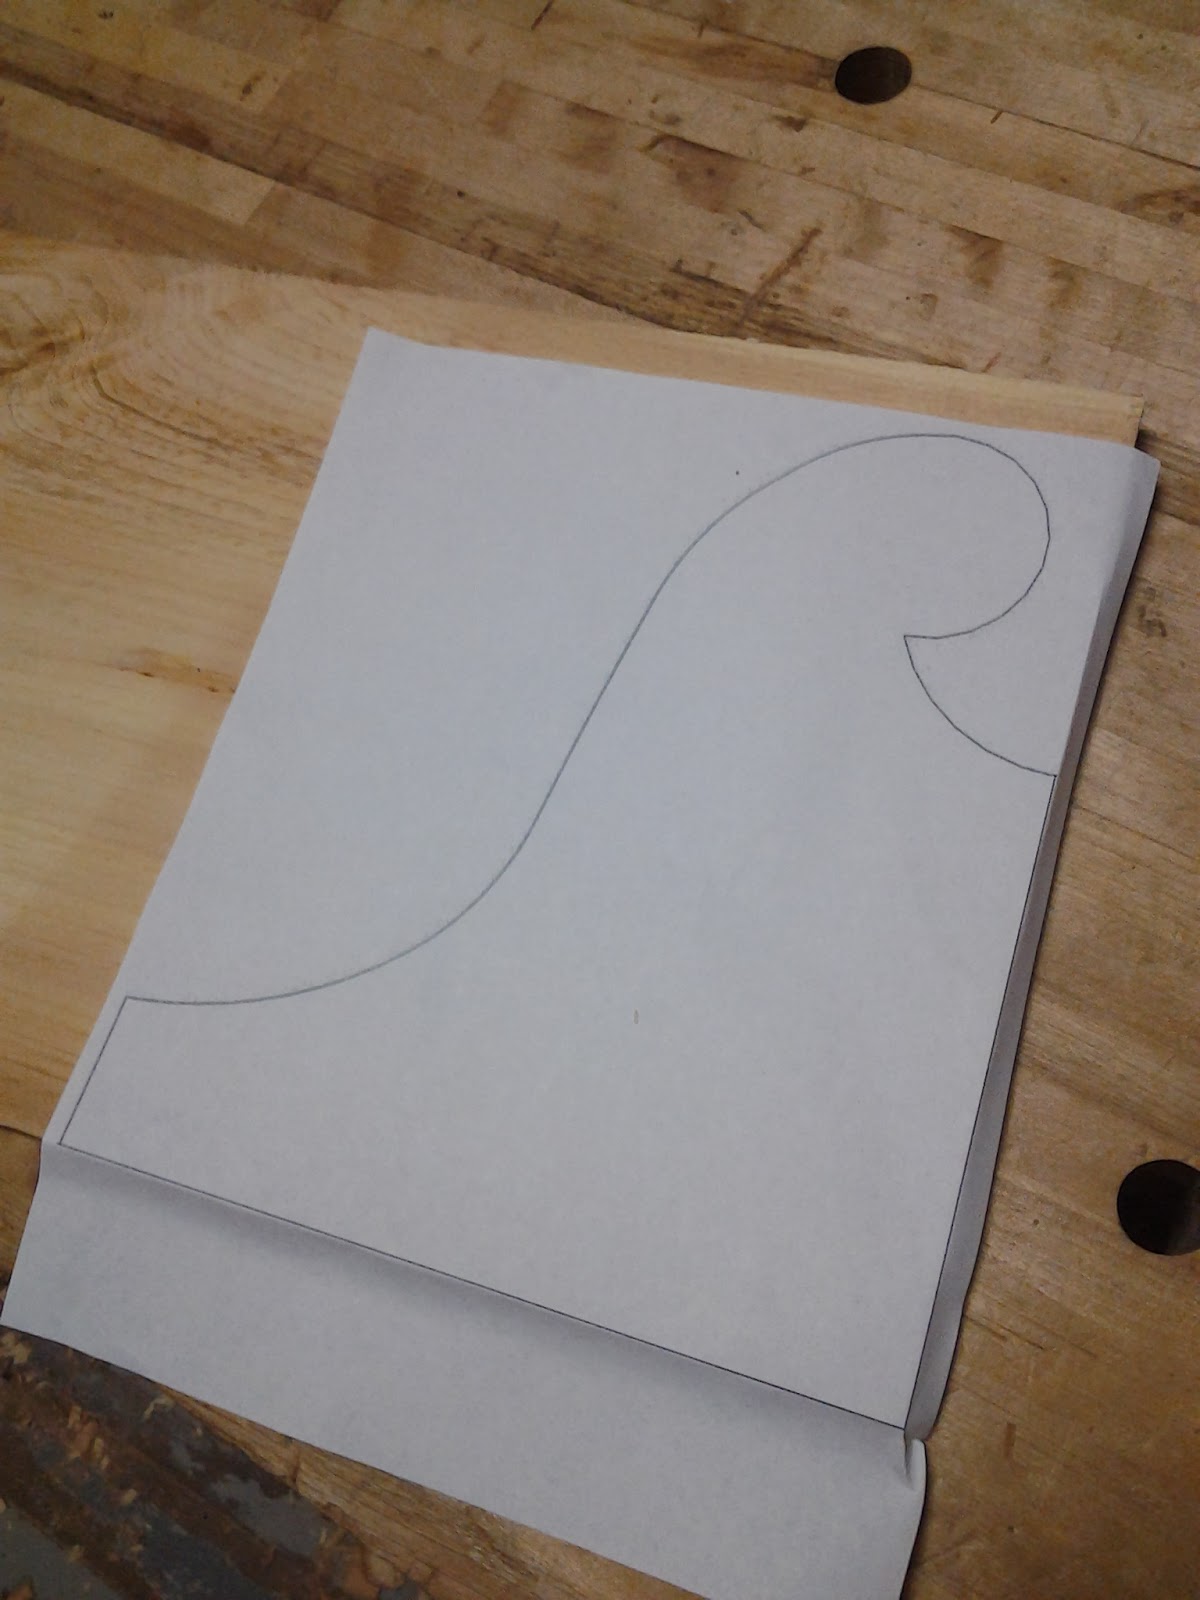
As you can see, the facade is quite radical. It is very high in proportion and a little odd. That is one of the main reasons I like this piece. Having imported the photo into Sketchup and manipulated the image to get a fairly accurate representation of the gooseneck shape, I then printed out 1/2 the shape as a full scale print.


I then hold the pattern in place and, using a very sharp knife, follow the lines and cut slightly into the surface. Some people choose to glue the paper in place and cut to the paper line with the saw but I don't like to do that for two reasons. I don't like to get glue in my saw teeth and my method provides a clear, sharp cut in the wood so that I know exactly how far to smooth with my rasp.

Darken the line with a pencil and use the square on the end
After finishing the layout work, I took a coping saw (plain old school one, not a fancy $100 piece). and cut very close to my line. While doing this, one has to be very careful not to undercut the line on the back side. Your aim is to make a very close to square cut while staying 1/16" to 1/8" away from the line. This gives you plenty of meat to smooth out later.

Square cut, well off the line but close to it
All cut out
Now it is time to get the rasp and sandpaper out. You need to make the curves smooth and square while just leaving the line. This is vital because this template will be flipped along the central axis to make the two halves of the piece. Any deviation from square will make the two sides unequal. So, if you want to avoid a funky looking facade, make the template as perfect as you can.


Make sure you hold the template low in your vise while working on it.  This pine is ridiculously easy to snap across the grain and the last thing you want to do is take out a big chunk of the piece you are working on. Holding the work low in the vise will help prevent this, as will using a light tough with the rasp. Also, be careful not to take out chunks of the work on the back edge, for the same reason you want to make sure the edges are square.


Leave just a bit of the wood past the line, as you can see in the above picture. This will allow you to sand the edge perfectly smooth without going past the line.

All finished in just over one hour
This is the finished template. You can see that I left a little bit more of the wood past the line on the left side of the piece, near the square cut.  This will give me just a bit of meat to smooth away once I have the side molding installed, as I want the facade, the side molding and the gooseneck molding to all meet neatly at this point. This gives me a little "wiggle room" to smooth away once that work is done.

The total time on this template is just over an hour. As you can see, I made sure to write the name of the project on the template.  I save all my templates so that I can easily remake the piece should another client wish to own one. No sense in reinventing the wheel every time.

Next up, I will be using my freshly made template to cut out the facade from some cherry. After that, I'll start making moldings.  To make the gooseneck, I'll be following the procedures described in Making Period Furniture (Fine Woodworking On). So follow along!

Let me know if you'd like to see more project write-ups like this.

William and Mary Escritoire Desk

Obviously, I am a fan of William and Mary furniture. The period between about 1690 and about 1720 (in America, anyway) produced some of the most beautiful pieces of furniture in the history of the art. From the staggering heights of a high chest to a simple book stand, William and Mary has something for everyone, yet is all too often ignored (thanks to PWM for helping to bring the style back to the forefront).

For some time, I have planned to build a close interpretation of the 1707 Edward Evans desk, now in the collection of Colonial Williamsburg.  I have drawn up a sketch based on the photos found in Worldly Goods. Other projects have distracted me from this goal, but a recent conversation on the Society of American Period Furniture Makers forum reignited my passion for the form by linking to an incredible  escritoire recently sold at a Skinners auction.

The Edward Evans desk
Skinner desk closed
Skinner desk open 
Skinner desk detail 1

Skinner desk detail 2
 I think I have enough walnut on hand to build a very similar desk. I'll probably have to come up with some poplar and I will have to find a source for "screeter" hinges.  I will definitely use drop pull hinges rather than the brasses found on the Skinner desk. Once I'm finished with my gooseneck and a Chippendale table for a proposed article, I will restart my efforts on this style of desk. I already have the lower case sides planed up and waiting... but that is the easy part.

Paring chisels are amazing

While working on my gooseneck cabinet last night, I noticed that there was a slight hump in the middle pine shelf board.  This is to be expected, given that the stock is prepared by hand and will almost never be perfect.  In most cases, it would be totally fine to leave it. This case, however, is not a standard case. This case is a case that will hold prized possessions, perhaps some rare books, or other delicate items. Anything other than a flat, smooth shelf surface will potentially cause damage to those items and it must be fixed.

I wanted to wait to remove this hump until the case was glued up so that I could ensure that the pine (which is made of a 2" wide cherry facing strip and a 9" wide white pine filler) would line up with the cherry perfectly. I glued up the shelf boards in situ after the case was assembled. To remove this hump, I turned to a trusted friend, a paring chisel.

No, I don't mean a chisel with a stubby blade and a long handle (these are not true paring chisels no matter what the ad men say). I mean a proper parer, one with a long, thin blade that makes Kate Moss look positively Reubenesque. One that is preferably made of a proper vintage steel that takes a ridiculously low bevel angle and is sharp enough to split atoms. My favorite chisel (the one I used last night) is an 5/8" wide, 3/16" thick, 8" long vintage Ibbotson with a boxwood handle. It has a sub-20 degree bevel on it... yes I have to sharpen it very often but it works so very well that I don't mind.

To make use of the chisel, I referenced the blade on the cherry front strip. Pushing the blade down into the surface, I raised the back end of the handle slightly.  This flexed the chisel a tiny amount. I then slid the chisel forward carefully at an oblique angle to the grain of the wood, paring halfway between with the grain and directly across it.

The chisel references the front strip, keeping the paring chisel from cutting too deep into the shelf board. Once you've hit an area that needs to be removed, simply flex the chisel a bit by modulating the pressure used to flex the chisel. This will move the chisel forward slightly, allowing you to remove fine whisper-thin shavings. You can also simply push the chisel into the work with the handle, but you lose control so quickly that I do not recommend this technique, especially given the necessary proximity of your off-hand.  I have no doubt that my Ibbotson could just about take a finger off if it were stuck into the "right" spot.

Repeat the process until you've achieved a smooth surface. Any remaining fibers can be scraped away or simply hit with 220 sandpaper.  I hope this helps you to think beyond planes when faced with a tight space.


Progress on my gooseneck cabinet

Four day weekends are the best. Even with chores to do (taking care of chickens, spending an inordinate amount of time cutting wood and tending to my wood boiler), I still found plenty of shop time to work on my  unique little gooseneck hanging case. As I said in my previous blog post, not everyone "gets" this piece, but that's ok. Hopefully a prospective customer will too (this piece will be for sale upon its completion).

On Thursday morning, I began with two pieces of cherry roughly planed to size. I planed the boards to length and width and tried to get them both to a roughly equal thickness. This is a step that is usually unnecessary in hand work but any major deviation here would be readily apparent in a small piece like this. 

On this piece, my reference surfaces on each side are the front edge, the inside face and the top end. Following basic hand tool technique, all layout work is only done from one of these three surfaces.  These surfaces are carefully worked to be flat, straight, and square to each other and are the only ones that can relied upon.

I started the joinery work by laying out the tops of each dado for the dividers. This work was done with the boards sandwiched together so that all dadoes end up in the same place. Then, using a fence, I ran my 3/8" dado plane (thanks Lee Richmond!) through the cherry to make the necessary dadoes.


Once this work was completed, I began to rip 2" wide strips of cherry to make the front faces of each of the dividers. This accomplished, I arranged them on the sides to mark them to the proper length. After this was achieved, I marked out the 3/8" x 3/8" tongue on each end. I then sawed out the shoulder and split the cheek, leaving some wood just fat of the line so that I could plane it down to a snug fit with my shoulder plane.


Once this was done, I was able to dry assemble the case for the first time and see the composition of the lower case (excluded the ostentatious gooseneck that will come later...)

As a result of my careful layout work, the case is square and the joinery fits well with a minimum of clamp pressure. This will make the whole thing go together much easier at assembly time.

After putting the case together with clamps (no glue yet), I was able to rip out the white pine filler strips. No sense in using show wood for parts that will be covered by books and knick-nacks for the life of the piece. Remember to always sever the edge of your work piece when cutting joinery cross grain. Most joinery planes designed for this type of work will have a knicker ahead of the blade, but I find it helpful to sever the first 1/4" or so with a knife, as this helps prevent spelching (a fancy word for grain blowout).  I make this mark with my bench knife after pulling my moving fillister plane backwards, using the knicker in the plane to show me where to cut.


One of the main structural elements of the case (as well as the method of fastening it to the wall) is a pair of dovetailed French cleats. The top of each pair of cleats is dovetailed and glued (probably will get a nail as well) into the back of the case.  To begin this work, I laid out the 45 degree angle on the end grain of the cherry, then used a marking gauge to define straight lines where the angle intersects each face.  I then marked out the ultimate width of the bottom cleat, as this would have been difficult to do after cutting the bevel.  I then rip-sawed down the angle, making sure to stay neatly on the line on each side of the work piece. This completed, I simply planed each face a bit to clean up the saw marks, then I ripped the bottom cleat free of the mother board. This process was done twice, one for each pair of cleats. The top pieces were then dovetailed into the back edge of the case, leaving the bottoms loose for the ultimate installation in the customer's home.


The last thing to do before gluing up the case is to cut the notch for the secret drawer.  The original 1790 piece didn't have a secret drawer, but I really enjoy adding at least one to every project that permits it. So, behind the molding on the right hand side of the case, there will be a 1" deep drawer that fills the open space between the real top and the false top.  

To accomplish this notch, I marked out the 1" depth of cut with a marking gauge, then marked the 1" wide parts on each edge of the board. I then sawed the vertical lines with my carcass saw, then proceeded to cut angles that intersected with those lines, notching out pieces along the full width of the notch.  I sawed close to the base line before chopping and paring the waste down to my line. Just think of chopping a really wide dovetail and you'll understand the process.


Well, there you have it. After I notched the right side, I glued up the case. I still need to pre-drill and install some nails into the dovetailed cleats, and I might install some nails into the dividers, just to make sure they don't go anywhere. Not sure about that yet. 

I hope you enjoy this post. Next time I will be doing the gooseneck pediment and maybe even carving some molding...

Zach                  

Antiquing new pine... or Conan Dillinger strikes again.

Earlier this year a friend of mine brought me this really neat old pine blanket chest. I'm guessing it is from the 1870s, give or take 10 years. Old red oxide paint finish, lots of character to the surface. Splitting, dings, dents, etc. This is the kind of look I try to achieve with my new pieces of furniture (to the consternation of many in the woodworking family). See the comments on this Popular Woodworking Magazine blog post for evidence...

Anyway, there is a method to my madness. I enjoy replicating old looking surfaces. So when my friend asked me to replace the long-missing side trim on this piece, I jumped at the chance.

Cool old surface
I used a piece of old growth pine, then re-sawed it by hand with my Disston D-8 rip saw, as the trim on this piece is only about 1/2" thick. I planed the resulting stock square and true.

 The molding profile on the baseboard is a simple astragal. In my immense collection of wooden planes, I just so happened to have a plane that exactly matched the size / location of the astragal and fillets, so that was used to make the profile.  I planed in the molding, as you have seen me do a hundred times, by starting at the far end of the profile, establishing the cut, then making longer and longer cuts by pulling the plane further back each time. Within two minutes (or less), I had a full 40" of molding cut.

The molding was then mitered, leaving the back ends long for trimming flush with the chest. Given the age on the piece, the miters on the original front trim are very worn, so I scribed the profile onto the new piece, then simulated wear on the miter of the new piece with a rasp, followed by a file.  This left a surface that closely matched the old miter end. I then took a chunk of hard maple and used it to round over the crisp edges and to introduce some surface dents and distressing scratches to the wood (read, I pretty much went Conan on the piece... thanks Megan for the nickname!).

Once the woodworking was complete, I took the pieces into my finishing room.  The first step was to dry brush dark brown oxide pigment into the surface to age the wood. This step alone adds 100 years to fresh pine.


As you can see, in this photo, some of the old original red paint was still clinging to the fillet below the astragal and to the flat surface.I made a red oxide and stand oil paint to brush into the fillet and to lightly smear about the surface. Then I took a dab of stand oil and a tiny bit of black iron oxide pigment to make a greyish, somewhat translucent paint. This was sparingly brushed into the top fillet and onto the top of the molding. This simulates the dirt and dust that accumulated in this areas over the years (look at the first photo to see how black this area is).

Once this was finished, I brushed a very light (less than a pound cut) coat of blonde shellac with a small amount of light brown ochre pigment mixed into it. This gave the surface the right golden color while minimally adding to the sheen, a perfect match for the original surface.

On top of the shellac, I daubed some small areas of green paint, as this chest features green drops sprinkled throughout the surface (this must have been in someone's room while the room was being painted). The green paint was made with stand oil and green pigment.

This completed the final finishing step. I used five cut nails on each side, then aged the nail holes with a tiny bit of india ink. The finished result is shown below.


I'd say the surface is very convincing and will only get better as the piece ages.

This is the type of work I love to do, telling stories with the surfaces of furniture.  This is why I find new-looking furniture so boring to look at. Sure, it is shiny and pretty, but where is the heart?

Zach


Shop made tools

While preparing for the annual Old Tools gift exchange known as Galootaclaus, I was brainstorming of what to make for my chosen "victim".  It occurred to me that I've never really done a "shop made tools" post here, so I decided to rectify that.

Some of these have been seen on this space, others have not.


Visible in this photo are:.

- the case sides for my Fall Project. They are still a little rough, as I prefer to surface my stock in stages.

- my 30" maple jointer plane with silver and pink ivory (wood, not tusk) inlay. This was based on a 18th century plane in my collection, although I lack a proper round-topped iron to complete the look. Soon, hopefully...

- my heavy hard maple mallet that I call Mjolnir. White oak handle with walnut pegs to hold the head on. It surely is the Mallet of the Gods. Mortising chisels tremble at the mere mention of Mjolnir.

- Walnut and copper plow plane. You've seen this before.

- Beech low angle plane. You've also seen this one before.

- A pair of mahogany squares that are replicas of the small squares found in the famous Seaton Chest. I am also working on a full set of three (this size, a medium size, and a much larger full size) for myself.

- A pair of small dovetailed dovetail markers (thats like meta-dovetailing!). These were made with the offcuts of the try square blades.

- My own winding sticks. The curly maple sight on the back stick came from a plank of wood that my now-deceased father gave me. It is very precious to me and I only use it in small doses and for things I use a lot, like my winding sticks.

The color in these photos is quite washed out. The mahogany squares are a deep, dark red in real life; the walnut is a purple green (air dried walnut for the win!)


As you can tell, I really like making tools. So much so, that I am offering my services to make any of the tools you can see here for sale.

I can make the dovetail markers for $15, the small squares for $40 (pricing on the two larger squares in the Seaton set is TBD) and the winding sticks (probably with boxwood inlay, not my precious curly maple) also for $40. If you are interested, please let me know via email at zacharydillinger@gmail.com.

I am also willing to make the planes you see here, but the pricing would be pretty darn high, especially on the plow. You'd be better off just finding a vintage wooden plane or purchasing from Lie-Nielsen if you are of the metal plane persuasion, but I'd be more than happy to provide you with my services if you just can't live without.

Zach

My upcoming Fall project

Last year, I was fortunate enough to participate in the Society of American Period Furniture Makers exhibiting at the Detroit Institute of Art.  We will be having another exhibition in March of 2014, an exhibition for which I need to make a piece.

I've loved this hanging cabinet ever since I first saw it in Antiques and Fine Art magazine earlier this year.  It was for sale by a major antiques dealer. The price was $20,000.

c. Antiquarian Equities, Inc.

Is it a little weird, perhaps unique? Absolutely. I've never seen another just like it.  Some will say the proportions are off, that the facade is way over the top. I agree. All of these things draw me to this piece for some reason. It has character, a je ne sais quoi that calls me to it.  I must make it.

The original is a New England piece, c. 1790. It is about 25.5" tall, 16.5" wide and 11 3/4" deep. Using the magic of Google Sketchup (a program I am still not very skilled with, but that is helpful for things like this) I worked out the dimensions and designed the piece as close as I can without actually paying $20,000 for the original.


I also added a hidden little bonus: a secret document drawer behind one of the side moldings.


Keep an eye on this space for details regarding construction, the sash door, and the secret lock setup on the drawer. Should be a fun piece.

Oh, and if you are wondering what has kept me from my blog for so long... here is your answer...


Its my new 1926 Model T. Sat in a barn since the lat 1940s. She now runs and drives very well after a couple of months of efforts. Still needs quite a bit of cosmetic work, as it doesn't really look any different now than it did in that photo. New tires and painted wheels, but thats it.

See you on down the road.

Zach